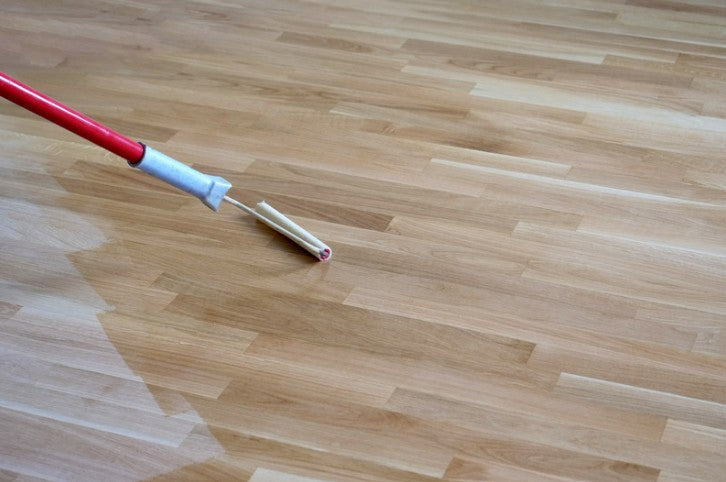
Refresh your timber floors with a durable, professional-looking finish using the right tools, prep techniques, and varnish system.
Varnishing timber floors can instantly lift a room but getting a smooth, even, and long-lasting finish requires more than just a quick brush-over. Whether you're redoing old hardwood or protecting newly installed planks, this guide will show you how to varnish wood correctly, how many coats to apply and how to avoid brush marks.
We’ll also help you select the right product pack based on floor size and traffic levels, featuring options like the Iceberg, SmartHome, and CeramicStar systems for top-tier results.
Step 1: Preparing Wood for Varnish
Preparation is everything. Before opening your varnish tin, ensure the surface is clean, smooth, and completely dry. Start by sweeping thoroughly and vacuuming to remove all dust and debris. Sand the timber to create a smooth, even surface, removing any previous coatings, stains, or oils if you’re refinishing.
After sanding, use a fine-grit sanding screen to eliminate scratches or swirls, vacuum again. Applying a primer like our Berger-Seidle FlexPrimer is recommended for porous or soft woods like pine, as it creates the best base for long-lasting results.
Pro tip: When varnishing timber floors, make sure all floorboards are secured, nails are countersunk, and there are no signs of moisture damage.
Step 2: Choosing the Right Floor Varnish Pack
Different rooms have different needs. Our varnish packs are tailored for durability, ease-of-use, and environmental sensitivity:
- Iceberg Pack: A beautiful, natural ultra matt finish. Adds the perfect Nordic touch! Optional: Add Aqua Pro Hardener for enhanced durability.
- SmartHome Pack: Low-odour, fast-drying – ideal for DIY use and budget friendly projects..
- CeramicStar Pack: Premium-grade finish with maximum scratch resistance. Perfect for investment properties or high-use floors.
|
Area Size |
Iceberg Pack |
SmartHome Pack |
CeramicStar Pack |
|
25m² |
2 x Iceberg + 1 x Aqua Pro Hardener |
1 x FlexPrimer + 1 x SmartHome |
1 x FlexPrimer + 1 x SmartHome + 1 x CeramicStar |
|
50m² |
3 x Iceberg + 1 x Aqua Pro Hardener |
1 x FlexPrimer + 2 x SmartHome |
1 x FlexPrimer + 1 x SmartHome + 1 x CeramicStar |
|
75m² |
5 x Iceberg + 2 x Hardener |
2 x FlexPrimer + 3 x SmartHome |
2 x FlexPrimer + 2 x SmartHome + 2 x CeramicStar |
Step 3: Applying the Varnish Without Brush Marks
For the smoothest coat, use a high-quality synthetic brush or a microfibre roller designed for timber finishes. Start at the far edge of the room and work toward the exit, always going with the grain of the timber. Maintain a wet edge to avoid lap marks and uneven finish. Always cut in the edges first and work in sections, doing 4-5 boards at a time from wall-to-wall.
Drying times will vary with temperature and humidity, so be sure to follow the product guidelines carefully.
Step 4: Sanding Between Varnish Coats
After the second coat dries and before applying final coat, lightly sand the floor with fine-grit (180-220) sandpaper to remove any raised grain or imperfections. This step is essential to ensure the next coat adheres well. Vacuum thoroughly before applying your final coat.
We always recommend a 3 coat system, no matter what varnish you use.
Avoid These Mistakes and Care Tips for Varnished Floors
To get the best results when varnishing timber floors, avoid these common pitfalls and follow a few simple aftercare steps:
- Don’t get too far ahead when coating, make sure you work in sections and keep the edges wet to avoid picture framing.
- Using low-quality applicators often results in brush marks or lint becoming embedded in the finish.
- Failing to ventilate the area (even with low-VOC products) slows curing and can affect the final look and durability.
Once varnishing is complete, take care during the curing process:
- Avoid walking on the floor for 12-24 hours to prevent marks or impressions.
- Furniture can be placed back 48-72 hours after final coat.
- Allow up to 7 days for full curing before placing rugs or heavy furniture.
- Use felt pads on furniture legs to protect your freshly varnished floor from dents and scratches.
Ready to Start Your Floor Transformation?
Varnishing is part technique, part patience. With the right preparation, premium varnish pack and a little patience, you can achieve a stunning, durable finish on your timber floors. If you’re unsure which product is right or need advice, don’t wing it! Our team is here to help you get it right the first time, every time. Contact us here.

